More charcoal making and grasping the nettle

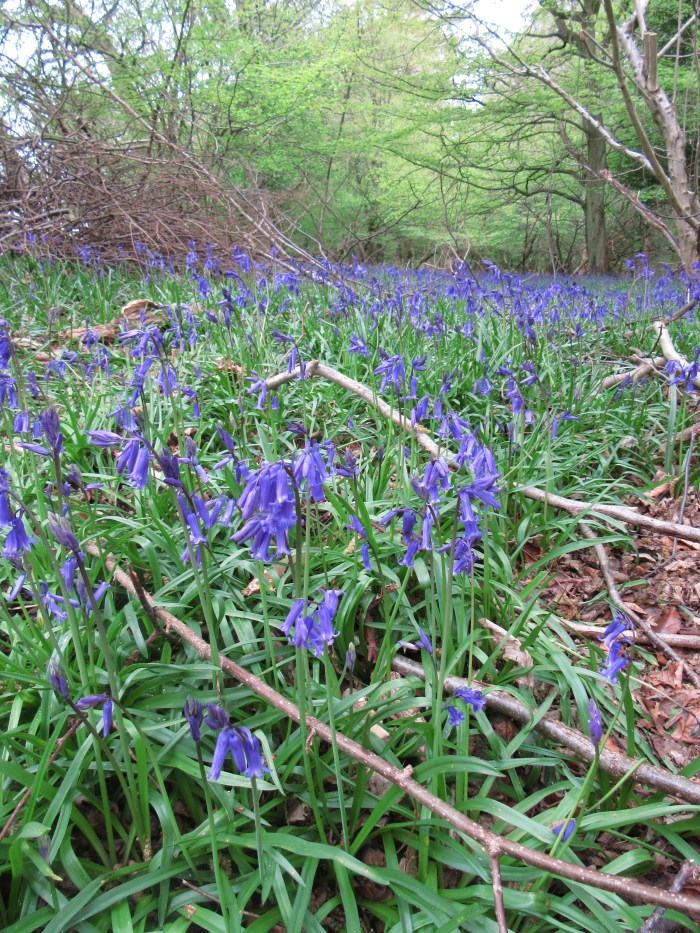
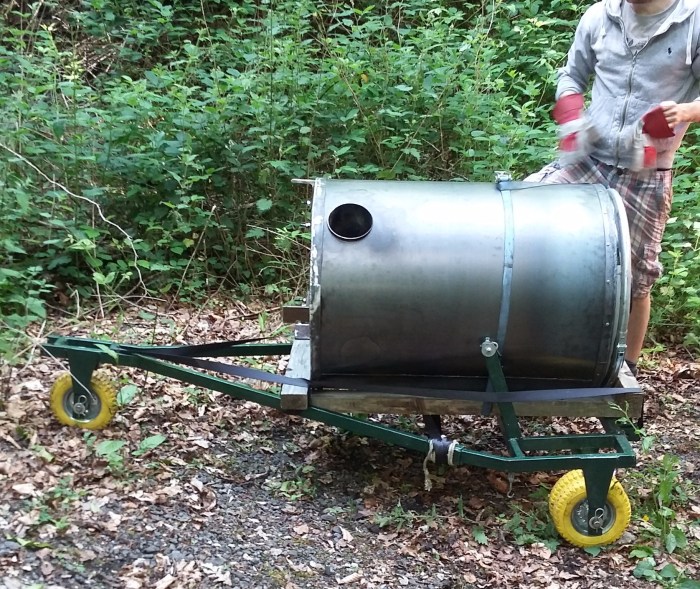
Last weekend Josh and I moved the charcoal retort into Pop’s wood so that we could start to perfect our technique and use the oven to its best effect. I was a bit concerned that we would struggle to manoeuvre the bulky item through the trees up to the top of the wood, I am keen to tread as lightly as possible and so didn’t particularly want to have to make a track or hack down any trees. In the event the transit went remarkably well. We loaded the oven onto the log carrier and strapped it down. I had imagined having to set up the winch to gradually pull the whole load up the slope which would have been very slow but the decent sized wheels on the log carrier made the going relatively easy and after a trial push we realised that it was practicable to simply push it all the way. When I say “we” it really was a joint effort apart from when I filmed Josh on a short section. The laughter on the end of the short clip was me being amused by the bizarre sight of a large metal can rolling past in the middle of a wood.

20170603_111503.jpg

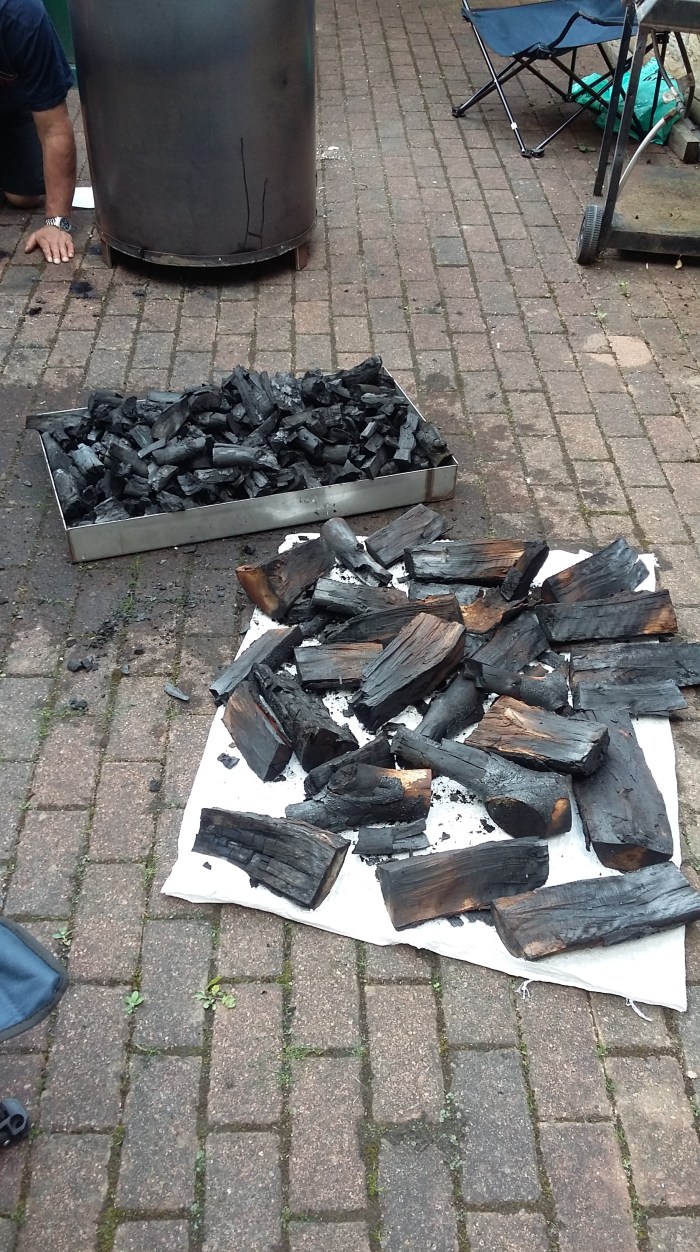
The second burn started off in the rain so unfortunately I didn’t get a chance to spray paint the outside of the oven, this will have to wait until next time. Following the conclusion from the first firing that there was a cold spot at the bottom of the retort, I raised the floor to be level with the combustion tube using house bricks on the base. This should mean that the whole of the wood in the oven is exposed to sufficient heat to complete the process and turn to charcoal.

The wood gas phase of the second burn was a lot more enthusiastic than the first one with flames roaring out of the top of the chimney. This part of the burn is where the gas being driven off from the wood in the oven is sufficient to provide all the heat to keep the oven hot without the need to add any further fuel wood. This section lasted for approximately 40 minutes. Hopefully this bodes well for there being charcoal when I open it up later this weekend. IMG_0478

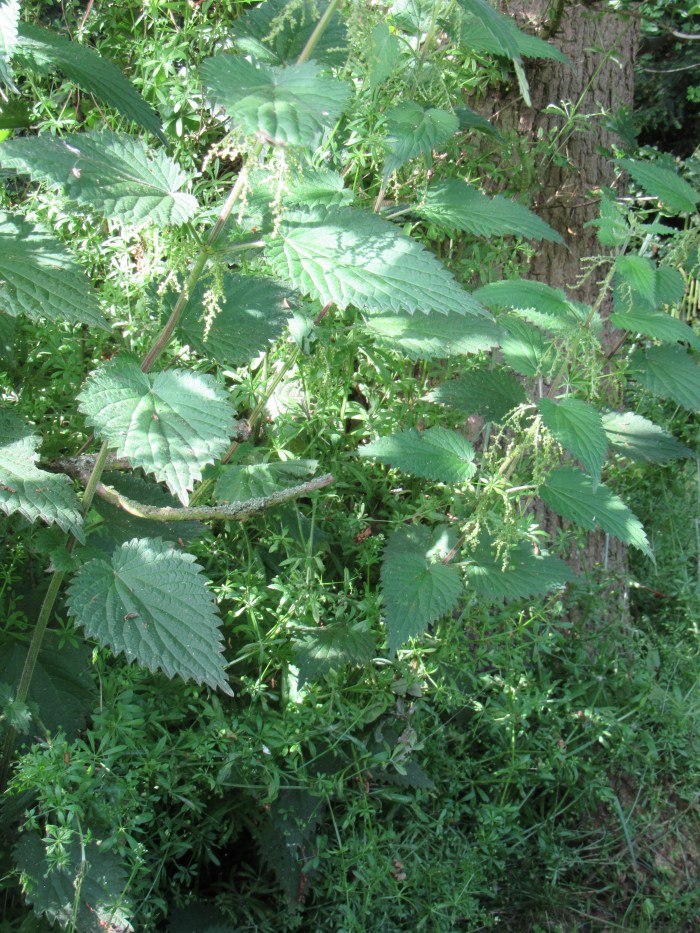
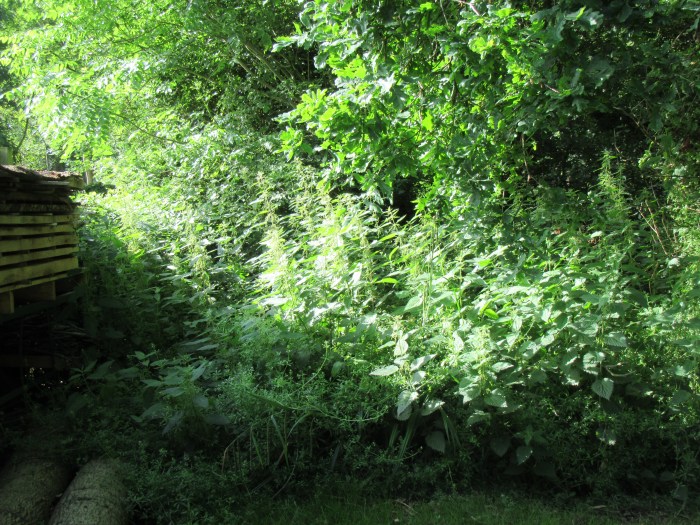
Nettles are amazing. The plants are nowhere to be seen over the winter period and only show their heads towards the middle of spring but by now in June they are well into their stride. From not being visible they can easily reach heights of six foot and above and have a very healthy leaf growth in that 6 week period. They are the UK’s only common stinging plant and have entered literature with Aesop stating:

“Gently touch a nettle and it’ll sting you for your pains,

Grasp it as a lad of mettle and soft as silk remains”.

This may refer to the fact that if a nettle plant is grasped firmly rather than brushed against, it does not sting so readily, because the hairs are crushed down flat and do not penetrate the skin so easily. Go on give it a go and test out the theory!

As someone once said after being stung by a nettle on his private parts “Can you take away the pain but leave the swelling”.

Nettles are fascinating – more on them next time……


Healthy sprouting stools, testing a charcoal retort and yuk – a dumped yukka.

I have to admit that I was nervous earlier this year when I carried out my first attempt at coppicing a couple of overgrown hazel trees. The contrast between their healthy growth of sturdy stems albeit hopelessly overgrown to the denuded stumps that were left was stark. The impact on the immediate area around them was also dramatic, where once there were a couple of very solid trees now there was nothing. The coppicing course that I had attended down in Shropshire and held on the top of Wenlock Edge in November, gave me the confidence to tackle the project. It also assured me that the stools would recover and go on to be healthier and last longer than before. So it would now seem. The photographs below show before and after shots of the first stages of the coppicing process. The top left hand picture shows the hazel trees immediately before coppicing began. The bottom left hand picture is immediately after the coppicing was completed. The one on the right shows the stools earlier this week happily with vigorous regrowth from all around the diameter of the each stool base which means that fresh roots are being made. This strengthens and rejuvenates the stool itself and is the first phase of the the 8 year coppicing cycle. Always satisfying when you can put the theory and training into practice.

Had a very interesting day at my older brother’s house earlier in the week when we had a test firing of a charcoal retort that he has fabricated from scratch. Here are some pictures and a short video which are probably the best way to show what we got up to and how the retort performed.

From left to right:

  1. Retort before filling with lid removed;
  2. Inside of the retort showing the larger diameter chimney and the smaller diameter tube that returns the fumes off from the wood in the retort back into the burning chamber; and,
  3. The retort lid and removable chimney.

From left to right:

  1. Retort being filled with seasoned beech logs;
  2. Nearly full and ready for firing; and,
  3. Fire lit in the combustion chamber and steam being driven off the logs in the “oven”.

There are distinct phases to the baking process that eventually produces charcoal, one of which is when the “wood gases” are driven off from the logs in the oven. These gases then are channelled down the smaller diameter tube and directly fed into the flames in the combustion chamber to further fuel the process. Here is a video of that part of the process.

And after about six hours we were left with quite a lot of charcoal (11kg)…..

20170531_170407

……….oh and quite a lot of brown ends where the combustion process was incomplete.

Further burns will try and refine the technique so that we can maximise the production of charcoal and minimise the amount of brown ends. That is the nature of a process I guess; where you have to work through the variables and try and determine out what works best and become a skilled operator along the way.

Disappointing to discover that there had been a forced entry into Pop’s wood during the previous week. Someone had cropped the padlock and tipped several loads of garden waste immediately inside the gate area. Of all things to fly tip I was the “lucky” recipient of several shredded giant yukka plants, still could have been asbestos I suppose. Not great to think that someone has been working out how to gain access and then illegally tip a load of waste that they have presumably been paid to dispose of professionally. These were “professional” gardeners who had bothered to shred the plant but thought that it was OK to break and enter and tip on someones else’s land.

Time to review and upgrade the security on the gate.

More next time.


Out came the sunshine and dried up all the …..logs

Phew, what a scorcher. Temperatures have soared with long sunny days and warm nights. Following on from the reasonable levels of rainfall that we have had over the last couple of weeks everything is growing like topsy (see Uncle Tom’s Cabin for this reference to Topsy – interesting).

Due to other commitments I have not been up to Pop’s wood yet this week but instead have been using the time at home to begin to construct a solar log drying kiln. Sounds grander than it is in reality.  The idea is very simple and basically comprises a large box with one of the sides covered with glass and positioned facing the sun. Just like in a greenhouse the sun heats up the air in the “kiln” and with a couple of inlets and outlets allows the warm air to circulate around the logs. This warm air picks up the moisture in the recently felled logs and then vents it out gradually drying out the wood. Given the  right conditions this should accelerate the seasoning process from in excess of say 12 – 15 months to as short as 3 – 4 weeks. This would allow some of the turkey oak to be sold in the autumn in time for this year’s heating season.

So how do you build one? Look on Youtube of course. Here is my sketch of what I decided to build learning from various previous soar kiln builders.

20170527_071709

So having developed a detailed plan I have started the build. Here are a few shots of the work in progress.

20170522_152615
The angle of the glass should ideally match your position of latitude apparently. So in this case is 52° from the horizontal so as to catch the most sunlight

20170522_152605

It is important that all the heat generated in the kiln goes into heating up the air and not the surrounding woodland. To try and retain the heat in the kiln I have made the walls double skinned and filled the cavity with insulation – rockwool in this instance.

20170524_123646

20170524_123642
The kiln is made up of separate pieces to enable me to fit the whole thing into my van. Each piece is secured to its neighbour to ease the erection of the unit in the wood which will be sometime next week hopefully.

If the kiln works well then it will generate quite a bit of heat in the summer sun and will dry out the logs pretty quickly. It really doesn’t matter how quickly firewood logs are dried out as the objective is simply to lower the moisture content so making the logs more energy efficient when burnt in a stove. The structural integrity of the firewood is of no consequence. However, this approach would be far too fast and fierce for drying out lengths of wood intended for use as timber. Here the drying process needs to be slow ensuring that the wood dries out evenly and free from “shakes”, which are the splits that you see running length ways in some timber. The plan is to see how this kiln works on firewood and then modify for drying out timber later in the year.

More next time………..

Hot legs, further rot and out of hours visitors

It has been quite warm in Pop’s wood this week. As can be seen on the data stamp at the bottom of the main picture, the temperature was up to 17°C by mid morning and was very humid given the heavy ran the previous day. This makes chainsawing and chopping up wood very sweaty work. The protective wear for use with the chain saw includes a pair of trousers that have very heavy cotton fibre padding all down the front of each leg. This is intended to clog up the chain and stop the machine so preventing you from inadvertently taking your own leg off. This padding is lovely and cosy in winter but in summer makes them very very hot to wear. The backs of each leg and the seat are normal single material thickness and so by comparison feel very exposed – a bit like a hospital operating theatre gown that they give patents to wear I imagine although thankfully not open backed so not a public health hazard.

I usually concentrate all my chainsaw work into the first session of the morning that way it is slightly cooler but also allows me to change back into normal work trousers and work my way through chopping the sections of trunk into manageable logs in the afternoon. Not a bad discipline really; make sure that I can tidy up all that I cut in the morning and leave the site clear for the next working day.

The current processing pattern is to make a chainsaw cut as deep as the blade will allow around the full diameter on each side of the main trunk. This creates a 12″- 15″ hoop that can then be broken off and further processed into logs. The approach is to use a hammer and a wedge to split into the hoop and remove smaller sections, this then allows the chainsaw to be used again cutting into the centre of the trunk that it couldn’t originally reach. Slow work made more difficult by the areas of timber that are rotten, these areas absorb any amount of hammering as they are too wet to split. All the rotten parts of the trunk need to be sorted out rather than put into the firewood pile.

20170510_103902
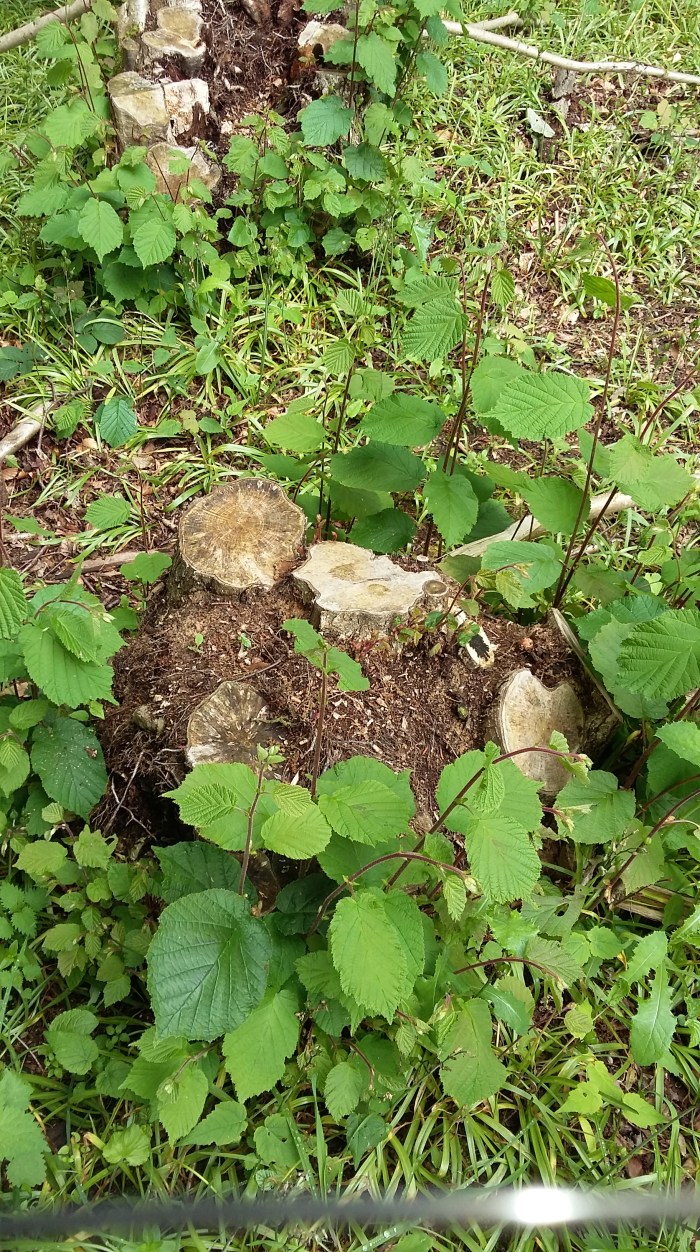
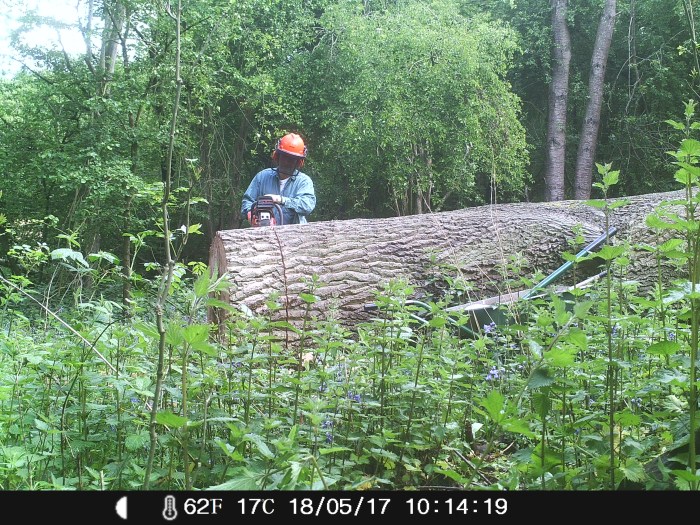
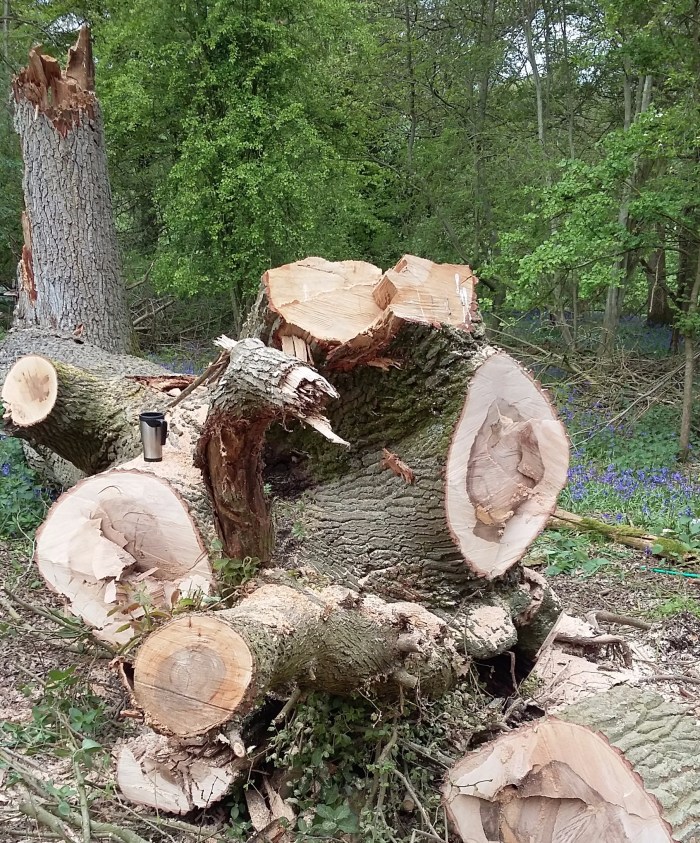
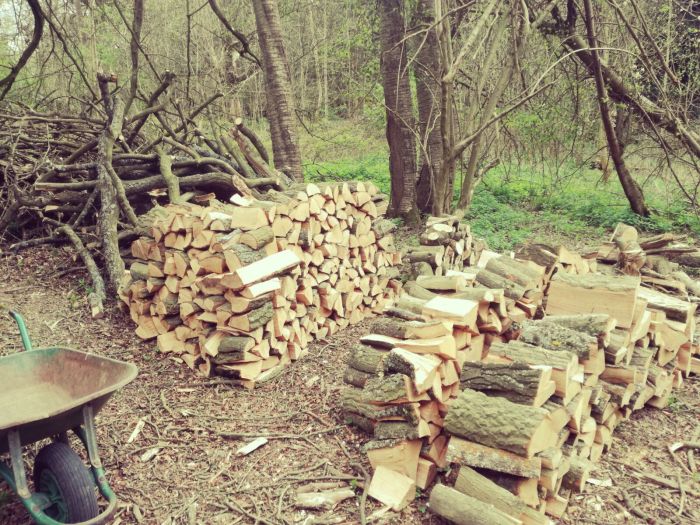
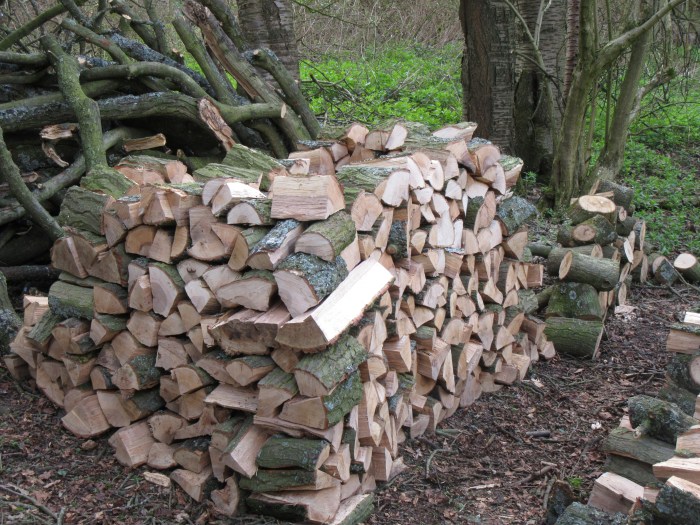
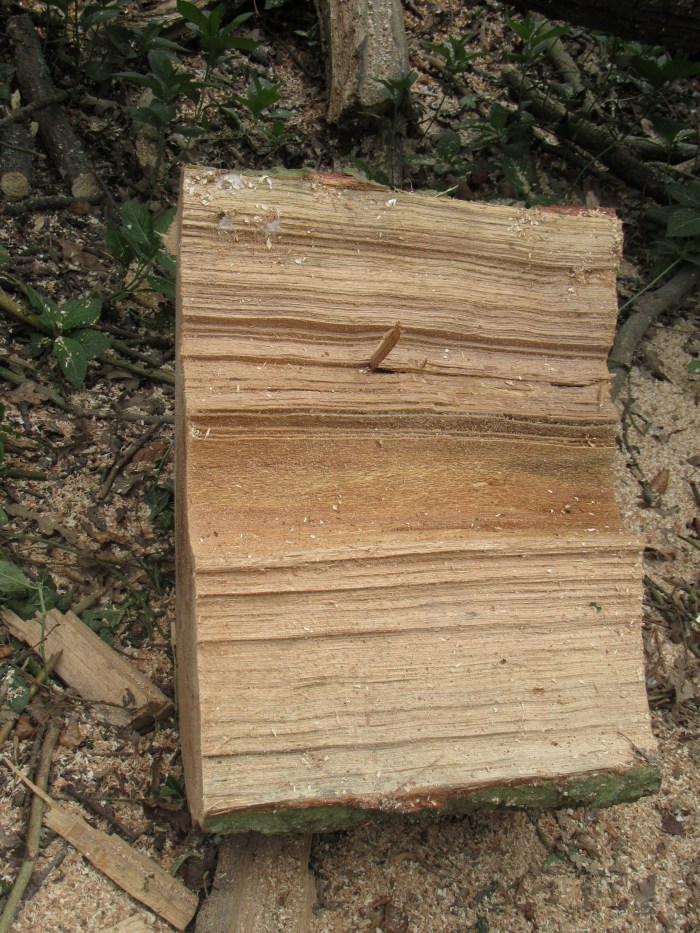
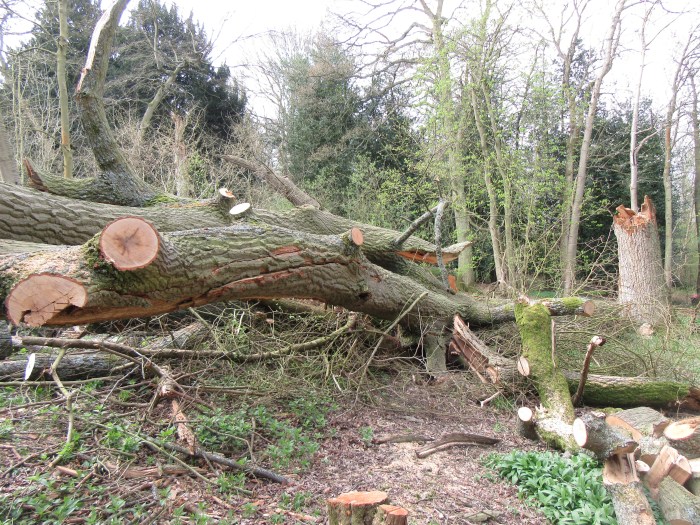
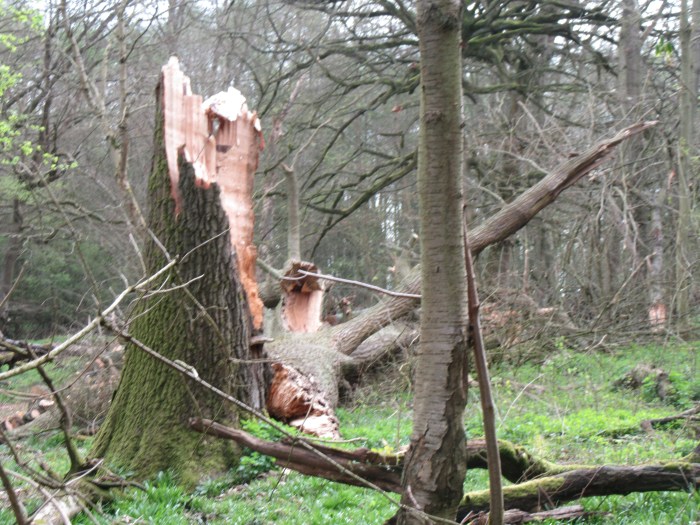
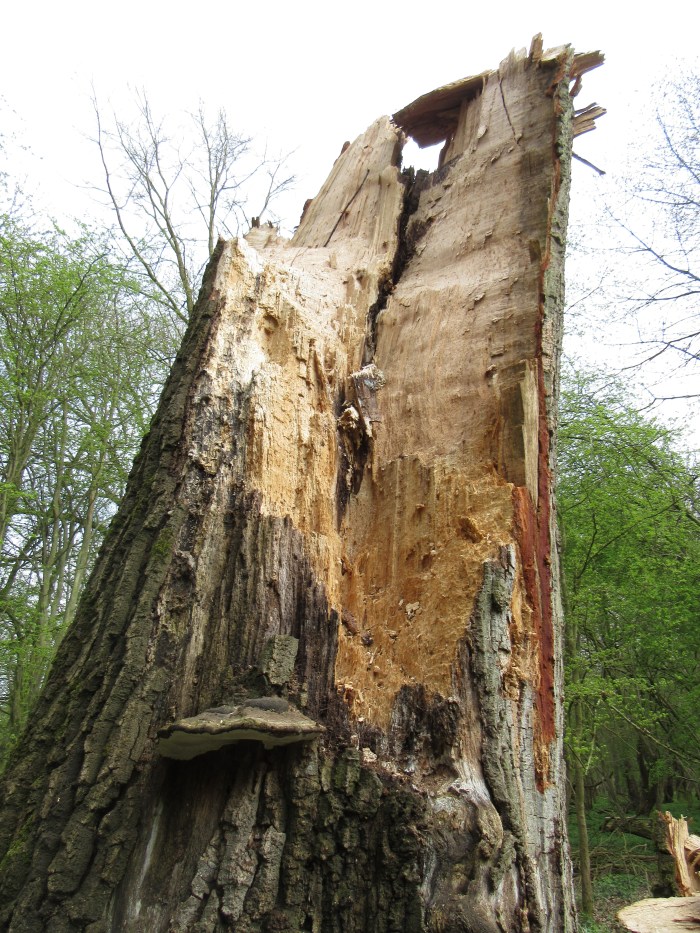
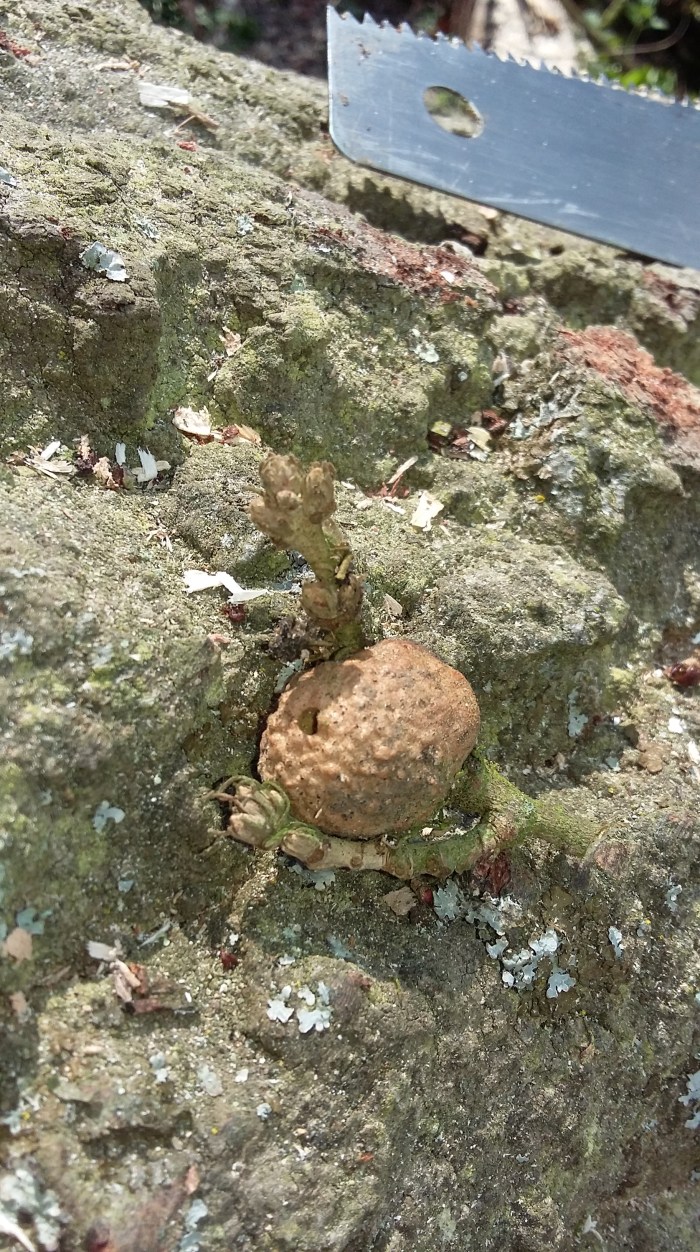
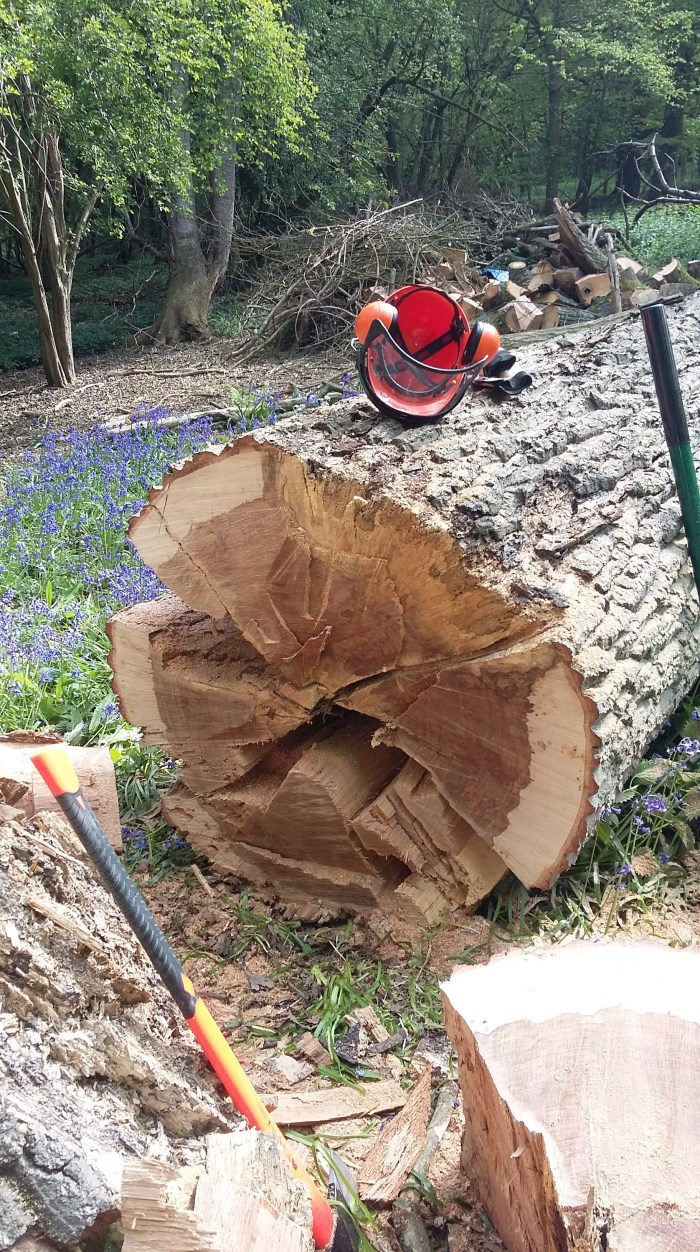
I am managing to cut and process about 6′ length of the main trunk so in a couple of weeks time will only be left with the main “knuckle” where the trunk branched out.

The poor old turkey oak had been extensively weakened by the fungal growth but also had suffered water and insect infestations at points of weakness in its structure. As I have worked my way along the fallen trunk, ie up the trunk as it was when standing, there have been a couple of points where a previous injury to the tree has created a point of weakness. In one case this was where a small side branch had been broken off leaving an open wound through which water and insects entered and over the years started a straight forward rotting process in addition to the fungal attack. Reinforces the need to always make clean cuts when pruning existing trees and to tidy up damage to standing trees wherever practical.

I often wonder what happens in the wood when I am not there. To try and gain an insight into that question I rigged up a camera that triggers when there is movement in its line of sight. I then set the camera to take a 10 second video of whatever it was that emerged. Here are a selection of what what happens after hours. My favourites are the badgers who almost look stripy in the infra red light and the pheasant who looks just like a rich land owner strutting through the wood in his natty waistcoat with his hands behind his back.

It would appear that the fallow deer just wander aimlessly around the wood nibbling at whatever they fancy. The two clips are sequential and show them walking down the wood and then two minutes later they walk back up the wood. Interesting to note that the muntjac usually is a lone animal although very occasionally is with a mate or young offspring but that the fallow deer are herd animals, the current estimate is that a herd of about thirty animals visit Pop’s wood as part of their nomadic ramble.

More next time…….

A fungi that isn’t much fun.

The colours in and around Pop’s wood are vivid at the moment. As you walk through the top half of the wood there are a series of snatched views looking out over the deepening blue of the carpet of bluebells towards the surrounding fields with their lemon yellow flowering rape seed. This colour chart contrast is further accentuated by the shade of the woodland and the full sunlight on the crop – again I am not a photographer and it is difficult to faithfully catch the colours, I am sure a professional could do this scene much better justice. However, what neither of us would be able to capture is the smell of the wood after a short shower of rain; the wild garlic mixed with the scent of the bluebells – amazing. Sadly the bluebells are now just getting past their best but is has been a lovely month long display this year or maybe they are always this good and I have just been paying more attention. If you have a chance this weekend go into the woods and take a few deep breaths to capture the smell of spring before it disappears on the breeze for a another year.

The turkey oak that was blow down by Storm Doris was infected by a bracket fungus and its structure had been greatly weakened by this infection. It is not until I have started to process the bottom of the main trunk that the evidence and extent of this infection has become apparent. Here are a few pictures of the bracket fungus that I took in October last year when the tree was still standing.

The fungus is in the shape of individual shelves or brackets of about 8 – 10″ a the widest point. This variety is commonly known as the artist’s bracket and is a very common perennial bracket. Perennial means that it grows year on year at the same location rather than dying at the end of the year. The underside is creamy white and can apparently be scratched with a sharp point to leave brown marks and so produce artistic images – hence the common name. Its formal name is Ganoderma applantum. Shining skin is the literal translation of Ganoderma, which comes from the Greek words Ganos, meaning brightness (or shining); and derma, meaning skin, although my specimens didn’t appear to have particularly bright shiny surfaces. Applanatum refers to its flattened or plate like shape.

This tough bracket is documented as being capable of living for many years, developing noticeable annual growth ridges on the upper surface. You can just make these out on the left hand photograph. In the autumn it releases several billions of spores that are rust brown and get carried away on the wind and perhaps passing animals. You can see a dusting of spores on the nettle leaves below the photograph on the right.

This fungus starts on the outside of the bark but as it matures it grows into the very heart of the tree itself. It eventually establishes a huge network of black threads called a mycelium which in our case is present throughout the entire main trunk of the tree. This network of filaments feeds on the nutrients passing through the centre of the tree taking away goodness from the tree. The fungus is truly parasitic and eventually it kills the tree from the inside out taking away the nutrients and compromising the tree’s strength making it susceptible to strong winds or simply collapses.

Here is a short clip showing the route from the bracket to the heart of the tree where it develops its black threaded network.

The extent of the network of the fungi’s reach is better shown on the clip below which was only revealed once I started to cut the trunk up for firewood.

Here is a single filament or thread extracted from the mesh and placed against a cut log.

20170512_114244

It is amazing how efficient the fungus has developed its approach to survival. Incredible to think that a tiny organism which started out as a microscopic rust coloured spore can bring a mighty 250 year old oak to its knees just through internal attrition and time – oh and a very strong wind.

Some videos next time of the things that come out when the wood is quiet.


No more branches, making a brew and sharing the loo with a nut eater.

Pop’s wood is accelerating into leaf with all the trees now generating their summer canopies. The beech and oak are usually the last in the process but are now just beginning to show signs of full leaf growth. The wood now has darker patches where the trees shade out the full daylight; views are shortened as the lower branches fill out and shield the wood making it very private.

The hedgerow is faring better than I had expected. During his visit in February Justin from the Forestry Commission took one look at it and said that it didn’t stand a chance against the deer and rabbits. Maybe I am being a bit too optimistic, or it is too soon to make an assessment, but there are only a few plants that have died so far and my regular resetting of the support sticks and the spiral tubes seems to be protecting the rest so far. Maybe once the plants poke their heads/foliage above the tubes then the deer will show more interest. My intention in the autumn is to replace those plants that have died with some spare hawthorn plants from the original hedge planting exercise that I dug into and earth clamp in the compound, this means that they are contemporary in terms of size etc with the existing hedge and should fit in well.

The huge turkey oak that got blown over in Storm Doris has proved very time consuming to process into firewood. However, the video clip above shows that I am now down to the single trunk having processed all the side and main branches; some of the stacked firewood is shown in the background. The diameter of the trunk is about 3′ and my chain saw only has an 18″ blade so I will have to nibble my way through it in small sections probably working from the base upwards this time to avoid the huge gnarly junction at the bowl of the tree. This is like a huge clenched fist and is where all the branches, well, branched out from and is pictured below.

20170505_123910
Gnarly bowl junction (complete with mug of tea for scale)

One of the best parts of the day in the wood is sitting down at lunchtime and making a cup of tea or a brew. To boil the water I have a little stove called a “Biolite”, this has a small fan that blows air into the fire that results in the small pieces of wood being burnt completely and fiercely. This makes the stove is super efficient when compared with say an open campfire with a kettle suspended above the flames. The stove is compact/portable and has the additional benefit of having a USB port which, when the stove gets up to temperature, enables me to recharge my mobile – amazing! The picture below shows the small amount of wood that is needed to reheat a tin of soup and boil enough water for a mug of tea.

20170505_115802
Incredibly small amount of fuel needed to warm some soup and make a brew
20170505_121005
Stove at full throttle with flames coming out at the side and the USB port showing a green light allowing the phone to be recharged

The video below has the comforting sound of the kettle boiling but also shows how the flames are swirled into a hot spiral by the air being blown int the combustion chamber.

Earlier this week whilst sat on the Tim Burr “Thunder Box” – an earth closet in the wood – I noticed a pile of hazel nuts tucked in at the base of the door. Closer inspection revealed the tiny teeth marks of a dormouse. So I have been sharing the loo with a dormouse, probably not at the same time as I think that we have been using the space for entirely different purposes.

More from Pop’s wood next week.

A sixty foot high bramble, wood balancing and dangling caterpillars

There has been a bit of rain over the last few days which after weeks of dry weather was very welcome for the hedgerow and the hardwood cuttings. Most of the trees are now fully leaved and the others like the ash and oak are well on their way to growing this year’s canopy. The immediate effect of this leaf growth is to reduce the amount of rainfall and sunlight reaching the hedgerow and so slow down its growth from here on.

IMG_0252
Sunshine coming through a gap in the canopy

After inspecting the hedgerow I make my way back to the van usually following a badger trail through the wood. This part of the wood was replanted as a pinewood plantation about fifty years ago with a mixture of spruce and larch making it quite shady. But there are also some hardwoods that survived the previous clear fell and have grown alongside the softwoods. Part of the management plan will be to thin out the softwoods and so open up the canopy, this will give more room for the oaks and ash to grow. With less leaf cover more sunlight will reach the woodland floor once again. This should encourage regrowth of perhaps some further hardwoods but certainly more woodland flowers in the short term.

Several of the larch have brambles growing up their trunks and in some cases these brambles have somehow managed to hang onto the larch as it has grown and now extend from the woodland floor all the way up to the top of the tree some sixty feet high.

All the green leaves that can be seen at the top of the tree are the new leaves of the bramble, sixty feet above its roots. Makes me wonder how the plant manages to pump water and nutrients all the way up to the top; bit like a giraffe’e heart trying to keep the blood going through its head at the top of that long neck. My apologies for the shaky camera work.

Processing the fallen turkey oak started at the ends of the branches and has progressed from thinner to thicker diameter logs. I mistakenly cut the smaller diameter branches into 10″ lengths as I thought that this would be a good size for most stoves and save double handling later on. However, I have now realised that the logs should be say 2′ long as this makes them a lot easier to stack. The problem with smaller, shorter logs is that they don’t balance on each other above say six layers. They become very unstable and fall down like a set of dominoes. My attempt at a Norwegian style circular pile was going well until it reached waist height then, as I placed one more log carefully on the top, it all slowly collapsed in a heap at my feet. “Oh bother” I remember saying. My technique has now developed into building a straight sided, rectangular pile with larger logs forming very stable corners and all the odd ball shaped, difficult to balance logs being thrown into the space created in the centre.

IMG_0338

This shape seems to work very well and has remained upright now for a couple of weeks. I just need to move them from where they currently are, which is adjacent to the fallen oak, to the top of the wood where they will get more sunshine and wind. This should allow them to dry out (season) nicely over the summer and reduce the moisture content. I have also picked up a number of used pallets to stand the piles on so that they are off the wet ground and have air circulating all round them. The wheelbarrow will come into its own during this transfer stage. Maybe I should have a “bring a wheelbarrow” party…..

IMG-20170415-WA0006

I got back from walking through the woods at the back of the house the other day and noticed that I had a dozen or so small green caterpillars on my jumper. These are about an inch long and at this time of the year dangle down from the hornbeams on long threads swinging about in the breeze. I have no idea what sort they are and so am not sure what sort of butterfly or moth that they will turn into later in their life cycle. Nor do I know why they have adopted this abseiling approach to getting out of the trees onto the ground. Perhaps I will do a bit more research and see what I can find out.

More from Pop’s wood next time.


Flying kites, an attempted break in and a knotty problem.

There was very little breeze today at Pop’s wood and the smell of the bluebells was in the air. Apparently the native British bluebell has a stronger scent than the Spanish ones and its not until this time of year that you remember their beautiful smell. Quite a scene with the bluebells getting to their best, the wild garlic in flower and the bracken just beginning to unfurl.

Opposite the entrance to Pop’s wood is a field normally occupied by a herd of sheep but empty at the moment as presumably the sheep are in a shed somewhere near the farm for lambing. As I drove up on Wednesday there were six red kites circling low over the field and landing in the top of a large oak tree. Given that until recently the red kite was in what appeared to be terminal decline (a book I have at home on British wild birds published in 1982 describes them as very rare!) and were only managing to hold on small numbers in Central Wales this is an amazing success story. They are a large bird with a wingspan of over 5 feet (165cm), they glide effortlessly soaring on thermals and sometimes you hear their mewing call a bit like a kitten.

As usual my first job is to check the hedge row and the fenced off compound for any signs of damage. On Wednesday there was evidence of an attempted forced entry. At a part of the fence that covers an old dip between two raised flint mounds, someone/something had been digging and undermining the wire mesh section at the bottom of the fence. Difficult to see if they had been successful and actually gained entry into the compound but none of the hardwood cuttings were damaged and none of the hazel regrowth had been eaten so I assumed that they had failed in their attempt. The usual suspects are the muntjac deer and the badger. My money is on the badger given their previous with the hedgerow. So I spent the first hour or so letting in a new piece of wire mesh but this time burying a section of it into the ground to a depth of some 4 inches or so to make it less likely that the next attempt would succeed either. Clearly fence maintenance is an aspect of woodland management on which to be super vigilant as it would be such a shame to have all the regrowth nibbled off in a muntjac/badger “come dine with me” special.

IMG_0393
Repaired section of wire mesh firmly embedded into the ground this time

Work on processing the fallen turkey oak continues. Each section that is chain sawed off the main tree has to be split and stacked so that it can dry out or “season” over the summer. This is very satisfying work on the whole but has its frustrations. Each bit of wood is subtly different with some splitting easily, straight along the grain whilst others appear to be straight forward but prove to be very difficult and time consuming due to the convoluted nature of the grain in and around branches and hidden knots.

Here is a very short video of a straight forward log splitting, it has a very satisfying noise a bit like the sound of leather on willow as a huge six is dispatched over the pavilion.

The grain in wood is part of the beauty of a finished piece of furniture, the various flecks and deviations from the straight line detailing intricate internal patterns and gorgeous natural artistry. However, rather selfishly when splitting wood you would prefer every piece to have perfectly parallel grain running absolutely straight from top to bottom rather like the picture below.

IMG_0406
Lovely straight parallel grain

That of course doesn’t always happen; here are a few examples of more challenging logs to split where the axe hasn’t been left in for the photograph to add scale or interest – it is actually stuck:

I mentioned two efficient “devices” last time. These two pieces of kit are rather humble, non glamorous and low tech but make the task of splitting and stacking significantly easier .

Firstly, the axe – the axe is amazingly efficient at splitting wood along the grain. What can be achieved in a split second with one blow of an axe would take several minutes with a chain saw and 10’s of minutes with a hand saw. Incredible how such a simple tool that originated with our ancient ancestors is still one of the best to use even in our super technologically sophisticated modern world.

Secondly, the wheelbarrow – not glamorous at all but essential for moving all those split logs to the log pile. I don’t know how to accurately calculate the efficiency of a wheelbarrow but I reckon I can carry up to three times the load in weight and many times more in terms of the number of pieces that I could physically grasp in my arms. So that in my very simple terms makes the simple wheelbarrow capable of making me three times more efficient. If only I had had one when I was working for a living!

More on stacking the logs next time…..

Feeling blue, bored and highly strung?

The bluebells are well on the way to their full bloom. Pop’s wood is not covered in bluebells but has a wide swathe of them forming a rich carpet at the top edge where the early morning sun shines in and remains brightly lit until sunset. Unfortunately this is also where the herd of fallow deer like to hang out when they visit the wood. The result is that a lot of the plants have been cropped off through grazing and a number have been either squashed under foot or/and under their bodies as they lay down. Having said that they are amazingly resilient and there is still a show.

IMG-20170410-WA0000
How do you capture that blue?

Someone recently remarked how hard it is to capture the colour blue faithfully and that certainly seems true with bluebells – above is a picture to prove the point. Clearly I am not a photographer and have yet to learn how best to capture these beautiful plants and their true colours to do them justice.

Sat out at home last Saturday I noticed a small ring of sawdust surrounding the base of an ash log that was sat on the edge of the patio. Closer inspection showed it to be covered in and surrounded by tiny flying beetles; the sawdust was either a result of them releasing themselves from the log or trying to bore into the log. Research on line narrowed the species down to most likely being the common furniture beetle which apparently lives as a larva within the wood and then comes near to the surface when ready to pupate. The sawdust is as a result of it finally breaking free and flying off. This seemed fine but the log was part of what I believed to be a living ash tree which I felled it in November last year immediately prior to the hedge laying weekend. The beetle doesn’t attack live or fresh wood. One explanation may be that the tree was actually already dead and had been infected prior to being felled. I will have to watch for signs of life from the remaining stump over the remaining weeks of spring and see if that is the case.

IMG_0346
Ring of sawdust from the boring beetles

My son Josh joined me yesterday (Good Friday) and we set about the removing the main two branches of the fallen turkey oak tree. The tree had been blown over by Storm Doris and as a result suffered a very heavy fall with the branches becoming shattered and twisted onto each other.  The job today was to try and safely saw through the uppermost branch which would take the strain off the lower branch that it was heavily resting against some six foot off the ground. After initially clearing the larger splintered wood from the top of the split with the chain saw we were left with the remaining bottom half of the branch diameter. This remaining section was being pulled down and stretched by its own weight making the wood fibres very highly strung. The result being that they would twang when cut through and spring up as they straighten out. We decided to use the large hand saw so that we could take the whole process very slowly and listen for the sounds of the tree as we cut through each of the “strings”. After a couple of hours, a lot of manual sawing and pulling on a rope that we had set up at the end of the branch the whole thing eventually gave one last crack and slumped to the ground.   Before and after shots below.

Good to get these branches safely onto the ground and ready for logging, splitting and stacking.

Next time more on the splitting and stacking along perhaps with something about those efficient devices that I mentioned in the last blog but haven’t covered off today.

Doris, an oak, two “tenants” and a wasp

Storm Doris blew through the wood on 23rd February this year. With a name like Doris the storm sounded like it would be quite a friendly affair. A bit like Deidre or Dorothy. I imagine storm Dorothy would have been a strong wind with pigtails, red slippers and three friends dancing and singing arm in arm between the trees before resuming their route on the yellow brick road. In reality storm Doris was a violent event causing a lot of damage on its passage across the UK. However, on this occasion nature’s destructive power was actually a positive development for Pop’s wood.

A couple of weeks earlier in February I had arrange to meet with Justin from the Forestry Commission in the wood with a view to getting some advice on the wood itself, my outline management plans and the health of a few specific trees. One of these trees was a huge turkey oak. The tree had a 13 feet (4m) circumference at chest height which indicated that it was at least 250 years old. When this tree was starting out George III was the new king, slavery had just been outlawed in the UK and they were having a tea party in Boston. However, at some stage it had been infected by a large bracket fungus. Justin was very knowledgeable and was clear that the bracket fungus (see picture below) growing at the base of the then standing turkey oak was actually killing the tree and that I would be well advised to pay to have it cut down before it fell down!

IMG_0341
Bracket fungus on the turkey oak


Whoops before I had a chance to think this through Doris had been along and the tree was down – problem solved.

Now what to do with the fallen tree?

Even though the tree was weakened at its base the large majority of the wood is perfectly suitable for firewood and so I started the process of sawing it up into manageable sections, splitting and drying all the resulting logs.

The job of processing the tree didn’t seem daunting until I actually started. It is a big tree and because of the violent way that it had come down there was a lot of damage done to the main trunk and branches, most of them had become twisted and so potentially stored a lot of tension which can be dangerous if it is suddenly released when cut through. So the task has turned into a giant game of “Buckaroo”, trying to work out which branches were resting on which others to determine the sequence in which to cut them.

IMG_0345
Large splits where the tree twisted as it fell

I was lucky on the first weekend to be joined by Paul and his two young lads Finley and Oscar. They all turned up one rainy Sunday morning equipped with their own hand saws and eager to get stuck in. We tackled a couple of the lower branches and, after I cut them into manageable chunks with the chain saw, Paul expertly split the logs with his axe much to the delight of the lads and we loaded their car up to the point where the boot lid just closed. Oscar and Finley had different approaches to tackling the sawing; after an initial enthusiastic start Oscar defaulted to his ipad; Finley however carried on with the chopping and sawing and I think if left in the wood would have worked his way through the entire tree making a pile of kindling sticks that would have been visible from space.

The job continues and today I was clearing the last of the side branches and getting to the main trunk and branches. Right at the point where the trunk finished and the branches started to branch off, in the bowl of the tree, I noticed that there was an ash sapling and a holly tree just starting to grow. A tiny bit of soil had accumulated in the small depression having presumably been washed in over the years and the seeds dropped by birds or blown in somehow had successfully germinated So some 40 feet up in the air the oak had two tenants, who knows how big they would have become if the tree hadn’t fallen over.

IMG_0343
The two “tenants” in the bowl of the tree

Towards the end of yesterday I was beginning to clear up when I found an oak apple. This is an abnormal growth or gall apparently caused when an adult female wasp lays a single egg into a developing leaf bud. They are quite common but I hadn’t noticed any others to date. The picture below shows the apple which is about an inch across, it has a tiny hole in it presumably through which the wasp larva breathes and ultimately escapes.

20170407_142524

More on the processing, two devices that make my life in the wood easier and anything else that catches my eye next time.